Saturday, December 1, 2012

Improvising with Dark Portraits

Dark portrait photography is a great way to create a dramatic and compelling portrait. The ideal method of creating a photograph like this would require a pitch black room and special lighting equipment. However, since many of us are not fortunate enough to have such resources, there are ways to improvise.

This is a photograph of my pup, Max. Believe is or not, this was taken in my living room with natural light. The sun was perfectly streaming through the blinds, so I propped little Max up and made it work. I kept my ISO low, and slightly under exposed the photograph to show the details of just his face. Since the light was on him and no where else in the room, this was the result. Crisp blacks, vibrant whites, and lots of detail. Not bad for a low budget photograph!

Tuesday, January 12, 2010

Beauty in Nature

I know it has been quite some time since I last logged in here and blogged, but have no fear-I am back! Currently I am visiting family in a small Missouri town named Hannibal-sound familiar? It should if you are familiar with Mark Twain and the tales of Tom Sawyer and Huckleberry Finn. But that is beside the point, I am here to talk about photography. I took this photograph in my grandparents backyard two days ago. Along with a flash, I used a shutter speed of 1/200 and an f-stop of 7.1 to capture this shot. Honestly, I was thrilled with the result. I had no idea I would be able to time it perfectly enough to capture one bird spreading its wings, let alone TWO at the same time. I took a few more, trying to imitate this one, but none really compared. As much as I would love to take full credit for this shot, I would have to say it was also a bit of luck...but at the same time, luck can't sign its name at the bottom corner, so maybe I will go ahead and take the credit. ;) If you want a shot like this, the best advice I can give is get close, have patience, and use a fast shutter speed.

Tuesday, November 10, 2009

10 Dive Bars, 1 Night


Recently I was hired to photograph the top ten dive bars in Sacramento for a local blogger. Accompanied by my chauffeur/adoring boyfriend, I hit the town thinking it would be a piece of cake. What I failed to consider was how quickly lighting changes at dusk. In the end I was very happy with the results, but I found it very difficult to get in a groove. Looking back now, it may have been smart to consider dividing the photographs among more than one night. Still, other than conserving gas, photographing all the bars back to back had its advantages. For example, each photograph turned out full of individuality. The fact that at each stop the sun had set a little more made for a variety of lighting situations. Yes it was difficult adjusting each time, but I believe the result made it worth it in the end.

For news on the hottest places, artists, and music in Sacramento, please check out SacRocks.

Follow the blog at sacrocks916.blogspot.com

Add SacRocks as a friend on facebook at www.facebook.com/sacrockss916#/profile.php?id=100000349514013&ref=ts

Follow on Twitter at twitter.com/sacrocks

Monday, October 12, 2009

Combining Special Effects

In previous posts, I have talked about both photoshop and time exposures individually. What would happen if we combined the two? This photograph is an example of an answer to this question.
The uniqueness of this photograph has brought up many questions. Let's start with how I was able to keep the shoes in focus while still ending up with the time exposure in the background. Unlike popular belief I did not photoshop two separate photos together. That may have been the easier option, but finding a way to capture the shot I envisioned at once rather than piecing it together was a greater challenge, making it more enjoyable. What I did, as I have explained in the previous post on time exposure, was first pop the flash. After this, I kept the shutter open for another 15 seconds. As I played with different shutter speeds and f-stops, this process took about 10-15 tries to get the shot I wanted. In the end, I was very pleased with the outcome, but rather than leave it be I decided to use a little photoshop and see what would happen if I made just the feet black and white and came up with this! I was thrilled with the different dimensions of the photograph. Just as we have moved from black and white photography to color we have moved from travel by foot to travel by planes, trains and automobiles. Color photography is amazing and beautiful, but there is something about black and white that really brings depth into the picture. Cars are also a brilliant technology that many of us could not even dream of living without. Still, it is sometimes easy to forget the joy of travel by foot, of moving at a slower pace, and of being able to stop and pause at one's own leisure as opposed to by the choice of the traffic signals that now, to some extent, have taken control of our lives.

Tuesday, September 22, 2009

Selling to iStockphoto-Tip #1

This shot was taken for my first photography show in May of 2008. It was one of my favorite shots, and for this reason I thought it would be a shoe in for selling at istockphoto.com. Well little did I know, finding photos they would accept was not as easy as I initially thought. As I began reading the email informing me one of my favorite photos was not adequate enough, I became discouraged, but as a read on I began to see why. Some photographers may tell you that losing some quality with a higher ISO isn't a big deal compared to using a slower shutter speed. In fact, I am taking a college course on photography and my instructor said this just this week. While this is true if you are taking photos for personal pleasure, or if you have low lighting conditions but still want to 'capture the moment,' if you plan on selling your photographs, especially online, the lowest ISO possible is necessary. I took this photograph at an ISO of 400, and for this reason there was too much noise for it to be sold online. After recognizing this problem, I began shooting all my photographs that I intended to sell at an ISO of 100, and it made all the difference! Having photos accepted into the world of stock photography does take skill and talent, but at least give your shots a chance by keeping them at the highest quality, because as you can see from this example, even a photograph that would otherwise be considered great will not be accepted.

Have any specific questions about selling photos to istockphoto.com? Shoot me an email and I would be glad to answer!

Monday, September 7, 2009

Patience...

Recently I ventured into Yosemite National Park for five amazing days. I had my eye up to the camera more than not and ended up with plenty of great shots, but my favorite BY FAR was taken on my way out of the park-after I thought the best of my shots from the trip had already been taken. Approaching an immense fire, all I could think of was the negative influence it was having on the land it consumed and those working to put an end to it. We pulled over to the side of the road to make a few car adjustments, and as I opened my door and looked up my jaw dropped. Before taking out my camera I knew it was the shot I had been waiting for. Fires, although in many cases devastating, can have a positive side to them too. In nature, fire has kept the giant sequoias alive for thousands of years by clearing out other trees that may otherwise have taken the nutrients necessary for them to survive. In photography, although maybe not as drastic, fire can create the most unmatchable of lighting. While we can go out searching for great photographs, sometimes the best thing to do is simply be prepared for when the great ones come to us. For this reason, one of the best pieces of advice is to take your camera everywhere! Sure sometimes it can be a hassle, but once you capture that shot you have been waiting for, I promise you will realize it was worth it.

Friday, August 14, 2009

Fun with Photoshop

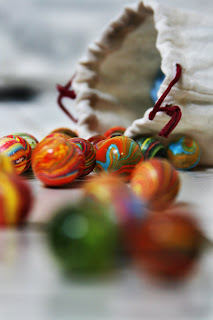
The possibilities of what can be done with Photoshop are literally endless. From touching up a few blemishes to inserting an entire person who is missing from the photo, Photoshop is a tool that amateur and especially professional photographers should utilize. Some might argue that this can alter the truthfulness of photographs that before computers existed was rarely questioned. This is true, at times, but if I'm taking portrait shots, I doubt leaving a big pimple on the subject's nose is going to be appreciated now or 10 years down the road. (Plus, sometimes Photoshop can be kinda fun.) This photo was just a fun example of altering the color and using different filters to make the picture look like cut out pieces of paper.
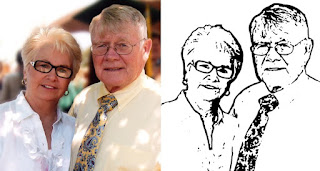
This next photo was used as print on a t-shirt to celebrate the couple's 50th anniversary. The ability to change the photo in this way was crucial for printing to a t-shirt while only using one color.
While only two examples have been provided, it is easy to see how much can be done with just one program. I could go on giving tips and tricks for using Photoshop, but there is so much that I wouldn't know where to start, let alone finish. The main purpose of this entry is that if you have any questions regarding how to use this tool, email me and I will post a segment on it. If its something I know about, I would love to help!

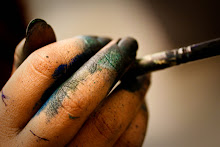
Already a Photoshop nerd and ready to take on a new challenge? Check out this link. I'm still tweaking my technique, but this is a pretty fun project to try out.

http://psd.tutsplus.com/tutorials/tutorials-effects/how-to-mold-paint-splatter-to-a-face-in-photoshop/

Saturday, June 20, 2009

Choosing the Right Depth of Field For Portraits


Portrait photography does turn out best with a lower F-stop/shallow depth of field, but in situations such as this where additional objects are in the foreground, one must be careful not to have a depth of field that is so shallow that it takes away from the sharpness of the additional subjects. This is the mistake I made in this photograph. I feel this photograph has great lighting and composition (other than the slightly tilted frame), but the fact that the toy trucks are out of focus takes something away from it. The depth of field used was f/5.0, but a f/7.0-f/8.0 may have turned out perfectly. Especially since plenty of light was available to decrease the size of the lens opening a bit. As a general rule of thumb, f/7.0 or f/8.0 is a good place to start, but depending on how visible you desire the foreground or background to be you may want to adjust this as needed. Want tips for specific lighting situations and photographs? Email me at photo.critique.made.unique@gmail.com and I would love to be of assistance.

Tuesday, June 2, 2009

Painting with Light


The Latin translation for "photography" is "painting with light." These types of Time Exposures take this to a more literal meaning. To the right is a photograph of Pablo Picasso, taken in France by Gjon Mili in 1949. The photograph was one of the first of its kind, utilizing the effects of having a lengthened shutter speed. In the photograph that I took to the left, the same skills are put to use. How does one go about creating a photograph such as these? For one, with a lot of patience and willingness to try again and again, but overall it is a fairly simple, and fun, task. The first thing you will need is a tripod, this is crucial for keeping the image from blurring or looking shaky with a shutter speed as long as will be necessary. The next thing is a light source which can be anything depending on the results you desire. For example, a lighter, a flashlight, or even the light from your cell phone will do the trick. Looking at my photograph, it is obvious that none of the above examples were used. We used the "Flashlight" application on my iPhone and set it to the colored strobe light, which is how we ended up with the rainbow light traces. Get creative and try anything that comes to mind! The next thing you will need is a camera with an adjustable shutter speed. You can either set it to the desired time (i.e. 20 seconds) or to "BULB" which allows the shutter to stay open for as long as you keep your finger on the shutter release button. Another important rule to creating these types of time exposures is it must be dark where the photo is being taken, otherwise it will turn out white from overexposure. Now you may be looking at these examples I provided and wondering how the men in the photos are so visible. The trick is to pop a flash, either at the beginning or the end of the exposure, burning a still image onto the photo, but still allowing for light traces to be added on top. Combining each of these skills is important, but your best photos will come after experimenting yourself and with practice. In my opinion, these are some of the most fun types of photos you can take because they combine the art of photography with the art of painting, the opportunities are endless!

Have questions? Email me at photo.critique.made.unique@gmail.com and I will be happy to answer them! :)

Tuesday, May 26, 2009

Let's start with a critique of one of my own

Snow may seem like a great place to take photos, but for many reasons this setting can have adverse results. For example, if an amateur photographer has the "white balance" set to automatic, the camera will most likely misread the color balance necessary for the scene and create a blue tinted snow. Another example of why snow is such a tricky element is that the color white is a natural reflector of light. Now this can be very helpful for photographers try to slightly brighten a dim scene, but an excess amount results in the photo I am showing here. The snow is greatly underexposed along with the boy as you can tell by the dullness of his blue jacket. How can we fix this? For those using a simple digital camera, it is very likely that your camera has a snow setting made specifically to counter these problems, but if not, you can also adjust the exposure that your photos are taken. Try searching your manual for either of these. For those using a film SLR, this is a perfect scenario to practice your bracketing skills. If you don't know what that is, it is the practice of taking three of each shot-one at the exposure you believe appropriate, one under it, and one above it. For those using a digital SLR, bracketing is also a great tool, but you have the advantage of being able to look at your photos on the spot. Don't forget to do this, and adjust appropriately while you are there rather than taking a bundle without seeing if they turned out.

I hope this was helpful! Send your photos to me at photo.critique.made.unique@gmail.com and I will give you the same help!